
SFM Compile: Compile Any Blender Model for SFM in 7 Steps
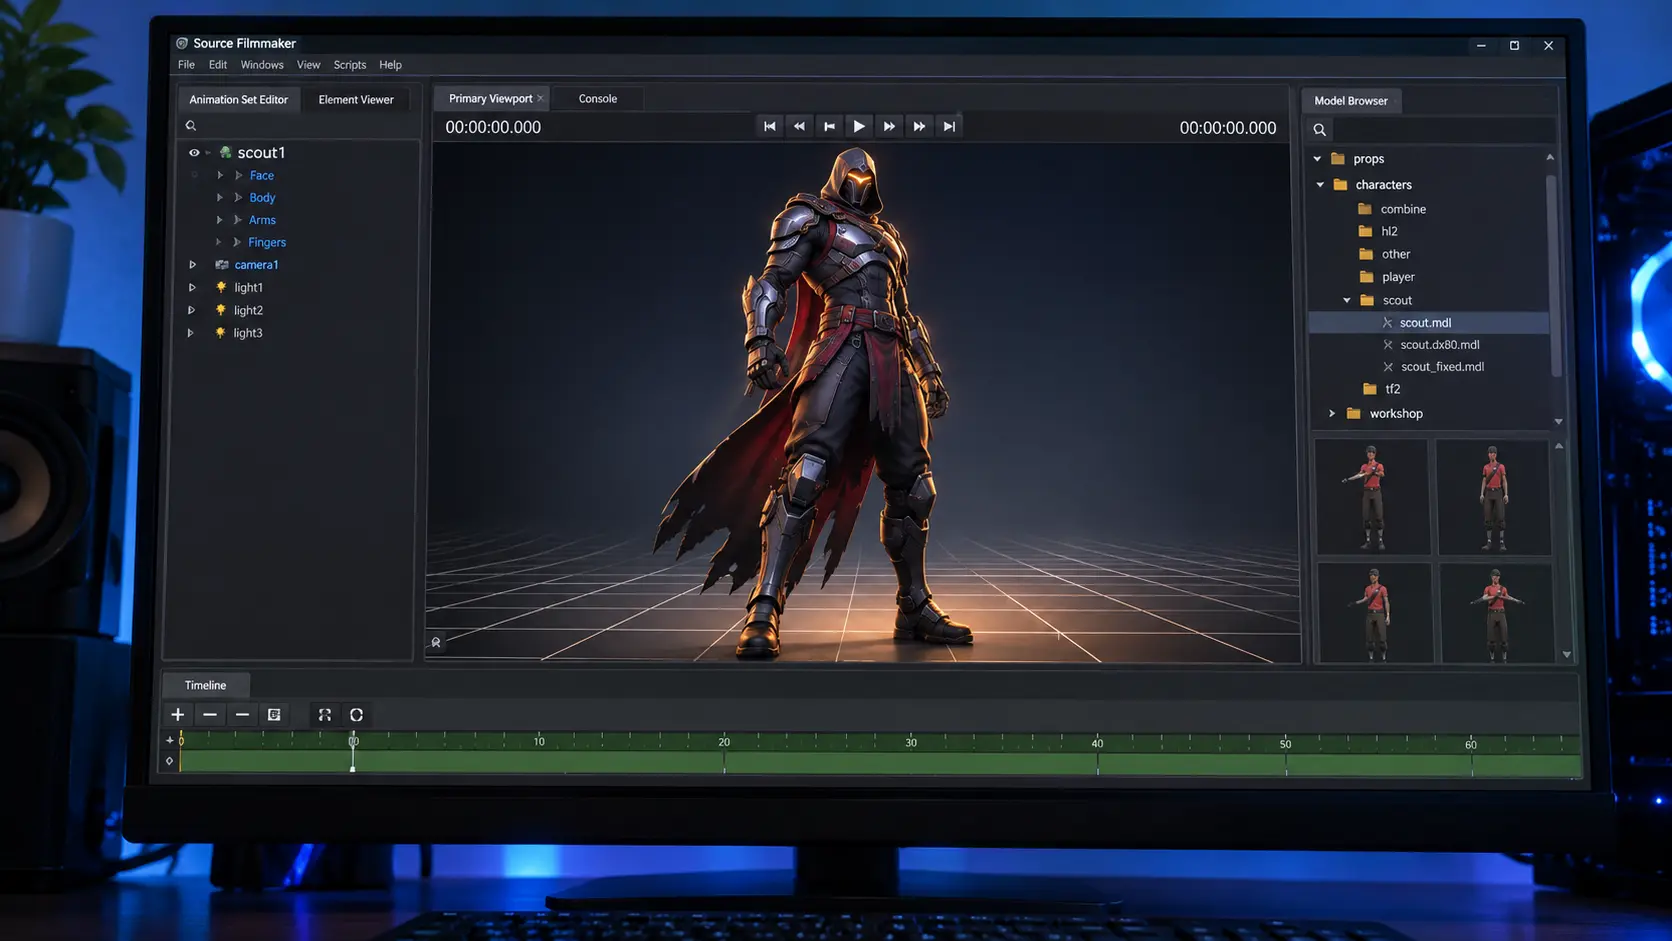
SFM Compile: How to Compile Custom Models for Source Filmmaker
Created a 3D character in Blender but cannot get it into Source Filmmaker? Or perhaps your model appears without textures, refuses to load, or produces errors during compilation. These problems usually occur because Source Filmmaker cannot directly use standard 3D project files as finished models.
SFM compile is the process of converting prepared 3D model data into formats that the Source engine can understand. It involves exporting model geometry, preparing materials, writing a QC script, and using Valve’s StudioMDL compiler to generate the required model files.
Whether you’re creating a custom character, a game prop, or an animated object, this guide explains the complete process using practical examples and beginner-friendly instructions.
What Is SFM Compile?
SFM compile refers to converting 3D model source files into compiled assets compatible with Source Filmmaker (SFM).
A model created in Blender, Maya, or 3ds Max contains information that Source Filmmaker cannot automatically interpret. The compilation process prepares that information and packages it into the formats required by the Source engine.
A typical model compilation workflow looks like this:
Blender → SMD/DMX → QC Script → StudioMDL/Crowbar → MDL/VVD/VTX → Source Filmmaker
The process can include:
- Geometry: Meshes, vertices, and model structure.
- Skeleton: Bones and their hierarchy.
- Materials: Texture references and surface properties.
- Animations: Movement sequences and character poses.
- Physics: Collision geometry and physical properties.
- Model settings: Attachments, bodygroups, hitboxes, and other engine instructions.
One important distinction: SFM compile is not the same as rendering an animation. Compilation prepares assets for the engine, while rendering produces the final video or image.
What Tools Do You Need for SFM Compilation?
You don’t need an expensive professional workstation or a large collection of paid applications to start compiling Source Filmmaker models.
The following tools cover most beginner and intermediate model workflows.
| Tool | Main purpose |
|---|---|
| Blender | Create and edit 3D models |
| Blender Source Tools | Export models into SMD and DMX formats |
| Crowbar | Compile and decompile Source models through a graphical interface |
| StudioMDL | Perform actual Source model compilation |
| VTFEdit | Convert and manage Source texture files |
| Notepad++ or VS Code | Create and edit QC and VMT scripts |
| HLMV | Inspect compiled Source models |
1. Blender
Blender is a free 3D creation application used for modeling, texturing, rigging, and animation.
It is a practical starting point for creating custom assets because it supports a wide range of modeling workflows.
Before exporting, check your model’s geometry, UV mapping, material assignments, bone weights, and animation setup.
2. Blender Source Tools
Blender Source Tools is an export add-on that helps prepare Blender assets for Source-engine workflows.
It supports exporting model information into formats such as SMD and DMX, depending on the selected workflow and configuration.
3. Crowbar
Crowbar is a popular community-developed utility for working with Source-engine models.
Its graphical interface makes compiling and decompiling models easier because users can select QC files, configure compiler settings, and review compilation logs without manually entering every command.
Important: Crowbar is not the actual compiler. It provides an interface for tools such as StudioMDL.
4. StudioMDL
StudioMDL is Valve’s Source model compiler. It reads the QC script and processes the model data referenced by that script.
It generates the compiled model files needed by compatible Source-engine applications.
5. VTFEdit
Source-engine materials commonly use VTF texture files and VMT material definitions.
VTFEdit helps convert supported image formats into Valve Texture Format and inspect existing textures.
Understanding SFM Model File Formats
Before compiling a custom model, understand the files involved in the process. Each format has a specific purpose, and confusing source files with compiled files is a common beginner mistake.
| File format | Purpose | Stage |
|---|---|---|
| .blend | Blender project | Source |
| .fbx | Interchange format | Source |
| .smd | Model, skeleton, or animation data | Source |
| .dmx | Model and animation data | Source |
| .qc | Compiler instruction script | Source |
| .vmt | Material definition | Material |
| .vtf | Valve texture data | Material |
| .mdl | Compiled model information | Output |
| .vvd | Vertex data | Output |
| .vtx | Optimized model geometry data | Output |
| .phy | Physics collision data, when generated | Output |
A successful compilation commonly produces an MDL file with its supporting VVD and VTX data. A PHY file may also be generated when collision information is included.
Remember: VMT and VTF files are handled separately from the main model compilation process. A model can compile successfully and still display missing textures if its material paths are incorrect.
How to Compile a Model for Source Filmmaker
Now let’s walk through the complete process using a simple custom model as an example.
Step 1: Prepare Your 3D Model
Start by creating or opening your model in Blender.
Before exporting, inspect these important areas:
- Geometry: Remove unnecessary objects and check for broken mesh sections.
- UV mapping: Make sure the model has properly assigned UV coordinates.
- Materials: Assign the correct material slots.
- Skeleton: Check bone names and hierarchy.
- Weight painting: Confirm that vertices are assigned correctly to bones.
- Scale and orientation: Check that the model has appropriate dimensions and alignment.
If you’re compiling a character, test its basic movements in Blender before exporting.
A poorly prepared model can produce problems that no compiler setting will automatically fix.
Step 2: Export Your Model as SMD or DMX
Source Filmmaker workflows commonly use SMD and DMX as intermediate model formats.
Install and configure Blender Source Tools, then select the appropriate export options.
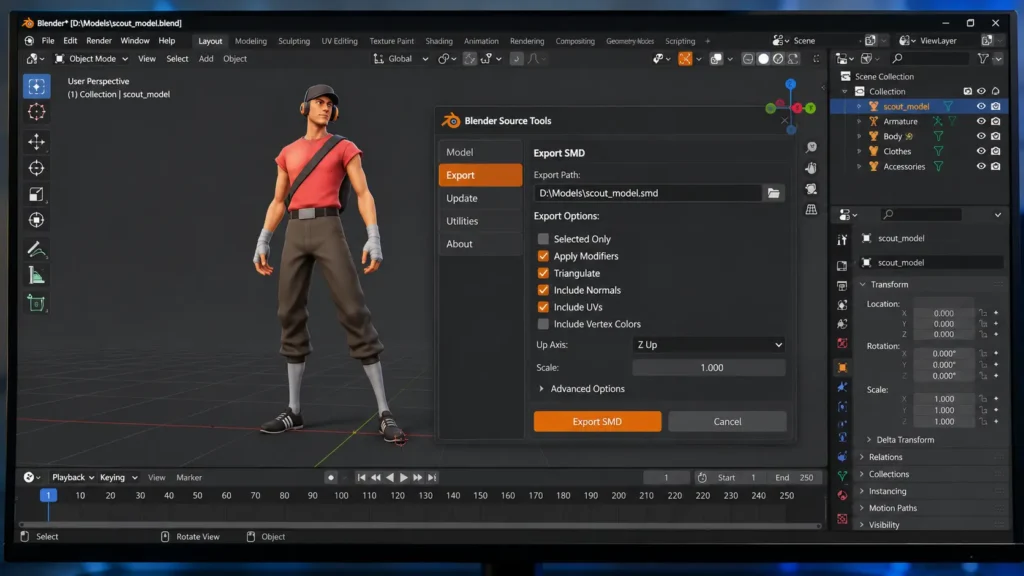
SMD is commonly used for:
- Reference meshes.
- Basic skeletal model data.
- Animation sequences.
- Collision geometry.
DMX is useful for:
- More advanced model data.
- Animation workflows.
- Facial flex and related character information.
The best format depends on your model, exporter, and intended Source-engine features.
After exporting, confirm that the files are saved in the correct project directory.
Step 3: Prepare Your Textures and Materials
A model’s geometry and textures are separate parts of the workflow.
For traditional Source 1 SFM materials, image textures generally need to be converted into VTF files, with corresponding VMT definitions.
For example, a simple material definition might look like this:
"VertexLitGeneric"
{
    "$basetexture" "models/custom/character"
}
Save the material definition as a .vmt file and make sure its base texture reference matches the location of the corresponding .vtf file.
A typical directory structure looks like this:
usermod/
│
├── models/
│   └── custom/
│       └── character.mdl
│
└── materials/
    └── models/
        └── custom/
            ├── character.vmt
            └── character.vtf
The actual directory and material names must match your QC settings.
Step 4: Create a QC File
The QC file is one of the most important components of SFM compilation.
It is a plain-text script that tells StudioMDL how to process your model.
A simplified example for a basic model looks like this:
$modelname "custom/character.mdl"

$body "Body" "character_reference.smd"

$cdmaterials "models/custom/"

$surfaceprop "flesh"

$sequence "idle" "character_idle.smd" fps 30
Here’s what the commands mean:
| QC command | Function |
|---|---|
| $modelname | Defines the compiled model path |
| $body | Specifies the reference mesh |
| $cdmaterials | Defines the material directory |
| $surfaceprop | Sets the surface property |
| $sequence | Defines an animation sequence |
This is a starting example, not a complete character QC script. More advanced models may require additional commands for bones, animations, collision geometry, bodygroups, attachments, and other features.
Save the file with a .qc extension in your project folder.
Step 5: Compile Your Model Using Crowbar
For beginners, Crowbar is generally easier than manually running StudioMDL commands.
Follow this process:
- Open Crowbar.
- Select the Compile tab.
- Choose the appropriate Source Filmmaker game configuration.
- Locate your QC file.
- Confirm the compiler and output settings.
- Start the compilation.
- Review the output log for errors or warnings.
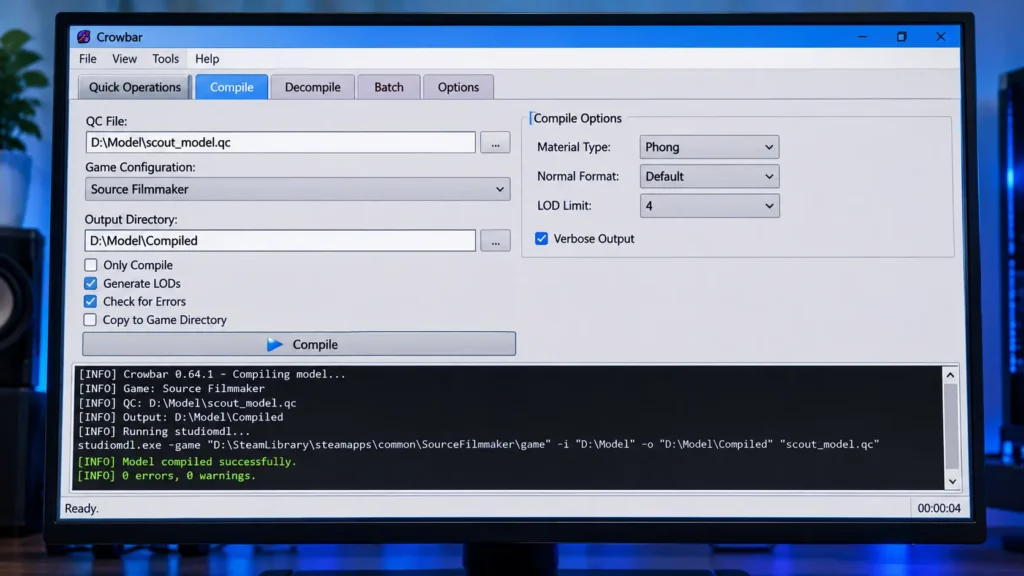
Make sure the configured game directory points to the correct Source Filmmaker installation and target game folder.
If compilation succeeds, check the output directory for the generated model files.
Step 6: Compile Using StudioMDL Command Line
Advanced users can run StudioMDL directly without using Crowbar’s graphical interface.
Open Command Prompt and navigate to the directory containing the appropriate StudioMDL executable.
A simplified command looks like this:
studiomdl.exe -game "C:\Path\To\SourceFilmmaker\game\usermod" "C:\Models\character.qc"Replace both paths with your actual installation and QC file locations.
The -game argument specifies the target game configuration, while the QC file tells StudioMDL what to compile.
Command-line compilation is useful for automation, batch processing, and detailed debugging.
Step 7: Install and Test Your Compiled Model
Compilation is not the final step. You must also confirm that Source Filmmaker can locate and load the generated assets.
Check the following:
- The MDL file is inside the correct models directory.
- The supporting VVD and VTX files are present.
- Material files are stored in the correct directory.
- Texture references match the VMT definitions.
- The model uses the expected skeleton and animations.
Launch Source Filmmaker, open the model browser, and locate your newly compiled model.
Load it into a test scene and inspect its appearance, textures, scale, and animation behavior.
If everything works correctly, your custom model is ready to use in an SFM project.
Common SFM Compile Errors and Their Solutions
Even when your files appear correct, compilation can fail because of missing dependencies, incorrect paths, or model configuration problems.
The following table covers common issues and practical troubleshooting steps.
| Error or problem | Possible cause | Recommended solution |
|---|---|---|
| QC file not found | Incorrect file path | Check the QC location |
| SMD file missing | Incorrect export path | Verify filenames and directories |
| Model does not appear | Incorrect output folder | Check the model installation path |
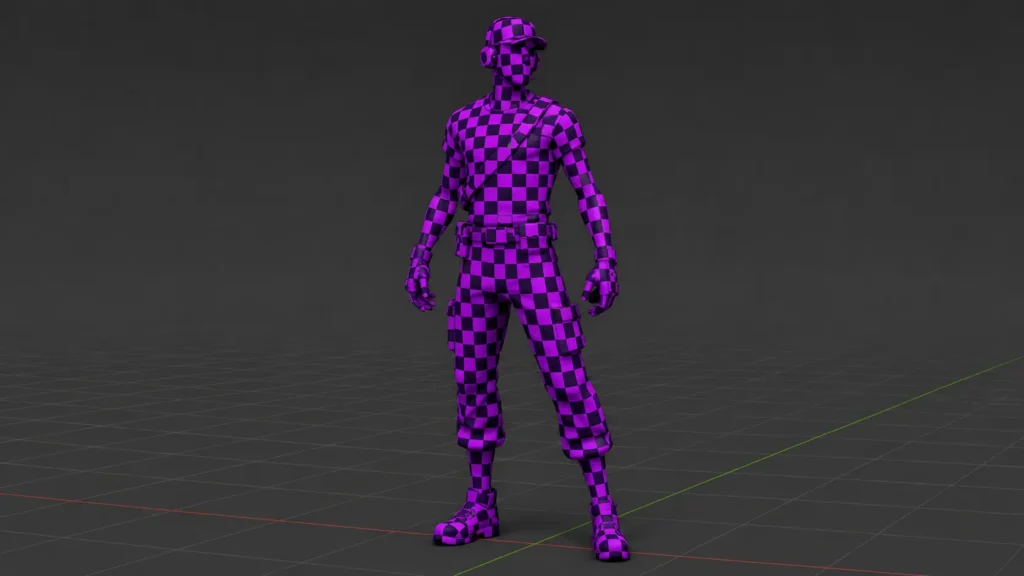
| Purple and black textures | Missing or incorrect materials | Verify VMT and VTF references |
| Model appears distorted | Incorrect weights or skeleton | Inspect the rig and bone assignments |
| Animation does not work | Missing sequence or incorrect animation data | Review $sequence and exported animation files |
| Compilation fails | Invalid QC command or missing source file | Read the compiler log |
| Model has no collision | Missing or invalid physics configuration | Review collision data and QC settings |
How to Fix Missing Textures
Missing textures usually indicate that the model cannot locate the material definition or its referenced texture.
Check the $cdmaterials path in your QC file, then verify that the VMT and VTF files exist in the expected material directory.
Also confirm that the $basetexture reference uses the correct material-relative path.
How to Fix a Model That Does Not Appear in SFM
First, confirm that the compiled MDL file exists.
Next, check whether the model was placed inside the correct models directory under the configured game folder.
If the files are correct but the model still does not appear, refresh or restart Source Filmmaker and inspect the console for loading errors.
How to Fix Broken Animations
Broken animations often result from mismatched bone names, missing animation sequences, or incorrect exported skeletal data.
Review the Blender armature, check the exported SMD or DMX files, and confirm that the QC script references the correct animation files.
SFM Model Compilation vs. Map Compilation
Another common source of confusion is the difference between compiling a model and compiling a map.
Both workflows prepare assets for Source-engine applications, but they use different tools and produce different outputs.
| Feature | Model compilation | Map compilation |
|---|---|---|
| Main source file | SMD/DMX | VMF |
| Instruction file | QC | Map configuration |
| Main tools | StudioMDL, Crowbar | VBSP, VVIS, VRAD |
| Output | MDL and supporting files | BSP |
| Main purpose | Characters and props | Environments and levels |
Model compilation is used to prepare characters, objects, and other 3D assets.
Map compilation processes level geometry and lighting into a playable or loadable BSP map.
Do not use StudioMDL to compile a map or assume that the model and map workflows are interchangeable.
Important: Source Filmmaker 1 vs. Source 2
This guide focuses on the original Source Filmmaker, commonly called Source 1 SFM.
Source 2 Filmmaker uses a different engine and asset pipeline. Its model formats, tools, and compilation requirements should not be treated as interchangeable with traditional SFM instructions.
Before following a tutorial or downloading a tool, confirm which Filmmaker version it supports.
This simple check can save hours of troubleshooting.
Frequently Asked Questions About SFM Compile
Final Thoughts
SFM compilation becomes much easier when you understand what happens at each stage. Preparing the model, exporting SMD or DMX files, creating a correct QC script, configuring StudioMDL, and checking the compiled output are all essential parts of the process.
For beginners, Blender, Blender Source Tools, and Crowbar provide a practical starting workflow. As your projects become more advanced, learning QC scripting and direct StudioMDL compilation gives you greater control over custom models.
The most important lesson is simple: A successful compile is not just about generating an MDL file. Your model must also have correctly configured materials, supporting files, compatible animations, and a working directory structure before it is ready for Source Filmmaker.